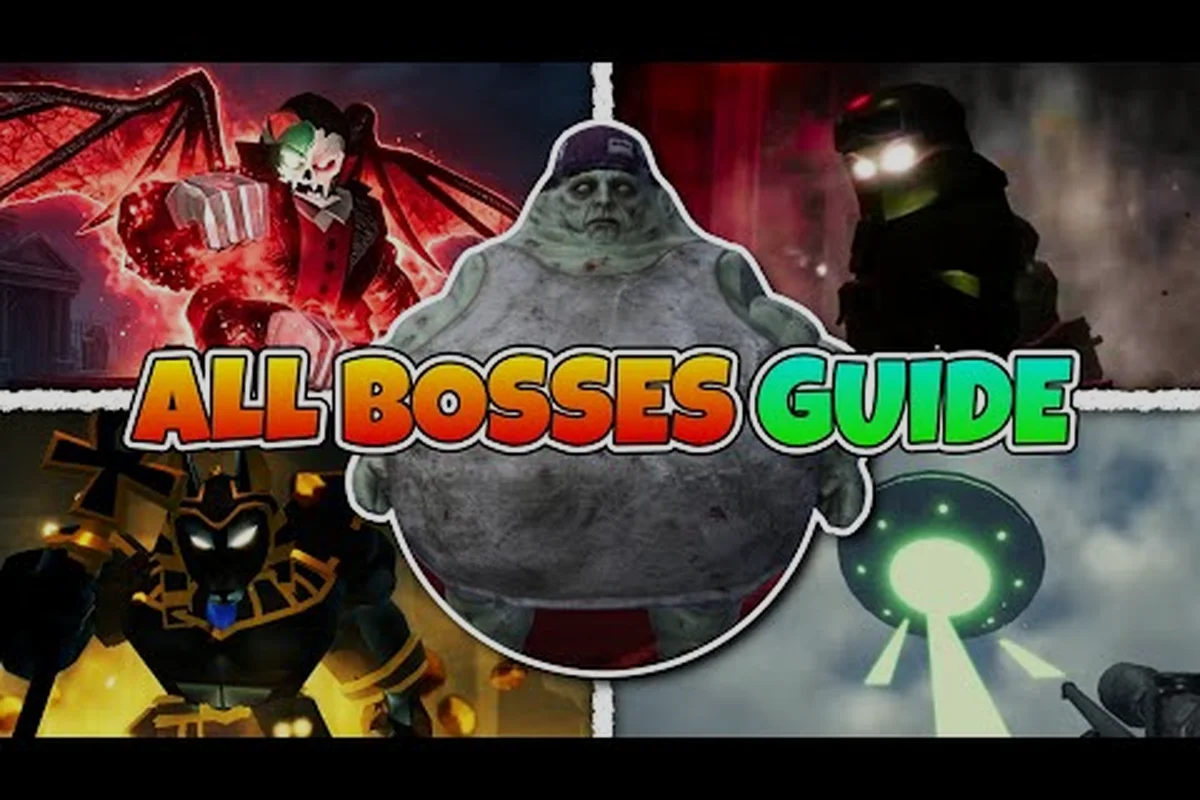
Bosses in Last Stop break every run that walks in unprepared, which is why serious players treat the boss roster as a separate skill track from the standard zombie grind. Every encounter — from the Military at the military base to Anubis in the desert, the Vampire Lord in the gothic town, the UFO on Nightmare Mode, the secret Hollowjack, and the final standoff with Fred — plays by its own rules, and each one gates different reward tiers. This guide breaks down the roster, the counters that actually work, and the loot and ending paths you can unlock by clearing them, so you stop burning ammo on bad approaches and start farming boss rewards with intent.
The Last Stop Boss Roster and What Each Fight Demands
Six bosses sit between your bus and the Last Stop finale, and the community has already settled on a rough counter for each one. The table below maps every confirmed encounter to its arena, its main gimmick, and the broad strategy that players report working in public runs as of the September 2026 update window.
| Boss | Arena / Trigger | Core Mechanic | Counter Theme |
|---|---|---|---|
| Military | Military base | Ranged gunner squad | Kite to open ground, drop gunners first |
| Anubis | Desert / temple approach | Damage-immunity field | Smash Anubis statues to drop shields |
| Vampire Lord | Gothic town | High burst, low mobility | Snipe from mid range, punish recovery |
| Alien Mothership | Nightmare Mode only | UFO strafing runs | Spread out, hit during hover windows |
| Fred | Final map (cure path) | Endless waves + timed cure | Hold chokepoints, prioritize escorts |
| Hollowjack (Box) | Secret encounter | Melee combo chains | Dodge through, punish the long wind-up |
Two of these — the Alien Mothership and the boxed Hollowjack — are tied to a Nightmare Mode unlock and the secret ending, so they only show up on specific runs. The other four are part of the standard boss progression that gates the cure Fred ending, and you can expect at least two of them on any full-length run.
How Boss Difficulty Scales Across Modes
The same boss hits very different depending on the mode you queued into, and the rewards move with that difficulty curve. Story Mode is where most new players learn the kit, Hard Mode tightens zombie waves between bosses, and Nightmare Mode stacks boss HP, adds the Alien Mothership as an extra gate, and is the only path that feeds into the secret encounter. The table below summarizes what community testing through early September 2026 has reported for the public difficulty brackets.
| Mode | Boss HP Modifier | Extra Boss | Reward Tier |
|---|---|---|---|
| Story | Baseline | None | Standard loot table |
| Hard | Roughly 1.5× | None | Bonus parts + Vault progress |
| Nightmare | Roughly 2×+ | Alien Mothership + Hollowjack | Top-tier gear + secret ending flags |
Run data compiled from recent clears puts the jump from Hard to Nightmare at the moment when last stop boss strategies stop being optional and start being the difference between a clear and a wipe, because the extra HP turns every mistake into a reset. Players who only learned the fights on Story are the ones who report the steepest learning curve on Nightmare.
Last Stop Boss Strategies: How to Clear Every Fight
A clean boss kill is the product of three things at once: the right bus loadout, the right positioning, and the right ammo budget. The five most reliable last stop boss tips that experienced players keep coming back to are listed below, and each one is unpacked in the sections that follow.
-
Kite the Military into open ground and clear its gunners before pushing.
-
Destroy every Anubis statue before committing damage to the boss itself.
-
Snipe the Vampire Lord from mid range and use his recovery frames for burst.
-
Range-counter Fred and prioritize the adds so the cure timer can finish.
-
Save ammo for bosses by meleeng roaming zombies and selling corpses to the sack.
The list reads as a simple checklist, but the real depth is in how each line interacts with your bus build, your squad comp, and the route you took to reach the arena. Players who treat the boss list as a fixed script and ignore the route almost always run out of bullets halfway through the gauntlet, because the Military fight alone can eat a full magazine of rifle ammo if you let the gunners chain suppression.
The Military Base: Kiting the Gunner Squad
The Military is the first real roadblock most squads hit, and the last stop military base guide advice that has held up across the early access period is to refuse the close-quarters fight. The boss itself carries a heavy rifle, but the real threat is the two or three NPC gunners that spawn around the compound, because they will suppress your bus the moment you park inside the walls.
Pull the encounter by honking just outside the base and then driving the bus to a stretch of road 200–300 meters away. From there, the gunners have to foot it into the open, and you can pick them off with a burst rifle while the bus acts as cover. Once the gunners are down, the boss is a much simpler fight: kite backward, keep your distance, and land burst shots during his reload animation. The Snow Plough Grill is a popular choice for this arena because it lets you shove zombies out of the way while kiting, and the saw variants add chip damage when you drive through loose groups.
Anubis and the Statue Puzzle
Anubis is the boss that punishes players the hardest for tunnel vision, because the boss itself takes heavily reduced damage while the four Anubis statues at the corners of the arena are still standing. Trying to burn down the boss before the statues is the most common reason squads wipe here, and the community has reported that the shield only drops after every statue is destroyed.
Approach the arena by parking the bus near one of the corners so you can use it as a hard cover while you burst down the nearest statue. Two players per statue is the safest split if you have a full 25-player server, and solo players should hug the wall to break line of sight from the boss's ranged attack. Once the four statues are down, Anubis loses the shield and his attack pattern becomes much more readable: a slow charge, a sweep, and a recovery window that rewards a full magazine dump from a shotgun or SMG. The bus's roof storage box is a good place to park spare statue ammo, because you will burn through two or three reloads by the time the last statue crumbles.
Vampire Lord: Snipe Windows and Recovery Punish
The Vampire Lord is the boss where positioning matters more than raw damage, because his melee combo chains can two-shot a bus if you let him close the gap. The counter that the community has settled on is to hold a mid-range perch — usually a raised piece of terrain just outside the gothic town — and treat his wind-up animations as the only windows where damage is safe.
The fight pattern is a long lunge combo, a short recovery, and then a ranged blood spike that hits hard if you are bunched up. Pistols and sidearms with high accuracy are the preferred weapons here, because the burst window is short and you cannot afford a missed shot. Players who bring a full-auto rifle tend to dump the magazine into the recovery frame, only to be caught by the follow-up blood spike. The bus should sit far enough back that the boss has to commit to the lunge, which gives your squad a clean shot during the recovery animation.
Fred and the Cure Ending Path
Fred is the gate to the cure Fred ending and the fight that most players will see at least once on a full run. The encounter is structured as a timed survival while your squad escorts a vulnerable NPC toward a cure point, and the boss himself spawns endless zombie waves that pressure the escort while also taking direct damage when you push him.
The community-tested counter is to range-counter Fred and prioritize the adds rather than committing to the boss. The cure timer only advances when the escort is alive, so the real objective is to keep the escort moving, not to burst Fred down on the first pass. Rocket launchers and grenades are the high-value picks here, because the add density is high enough that single-target weapons run dry before the cure finishes. Players who reach the finale with a fully upgraded bus and a stockpile of explosives are the ones who consistently walk into the true ending rather than the bad one. The detailed route for unlocking the cure is covered in the dedicated Fred fight walkthrough, which pairs with this guide's loadout advice.
Hollowjack and the Secret Encounter
The boxed Hollowjack is the secret boss that ties into the secret ending path, and the encounter is gated behind a specific item you can only find in Nightmare Mode. The fight is a fast melee combo that punishes panic rolling, and the counter is patience rather than burst: dodge through the first swing, sidestep the second, and punish the long wind-up at the end of the chain.
The reward ceiling for this fight is the highest in the game, because the secret ending flags also unlock a Vault cosmetic track that does not show up in the standard clear path. The full Hollowjack unlock chain is documented alongside the broader secret ending in the boss order and ending guide, which covers the item you need to bring to the boxed arena and the dialogue triggers that have to fire before the boss spawns.
Last Stop Boss Rewards: What You Actually Get for Clearing
The loot tables in Last Stop are tied to boss kills rather than wave clears, which means the last stop boss rewards track is its own progression system on top of the standard bus upgrade loop. Every boss drops gear, but the tier of that gear moves with the mode you cleared it on, and a handful of bosses also drop unique items that gate the secret and true endings.
| Boss | Common Drops | Rare / Mode-Locked | Ending Flag |
|---|---|---|---|
| Military | Rifle parts, ammo crate | Military armor mod | None |
| Anubis | Shotgun shells, melee mod | Ancient rune (secret path) | Secret ending setup |
| Vampire Lord | Blood vial, sidearm | Vampire cloak (Nightmare) | Secret ending setup |
| Alien Mothership | Alien alloy, special ammunition | Alien class unlock | Nightmare gate |
| Fred | Cure vial, finale token | True ending key | Cure / true ending |
| Hollowjack | Boxed mod, Vault token | Secret cosmetic track | Secret ending |
The Alien class is the only named class tied to a specific boss drop, and the Alien bus is the only confirmed bus variant that pairs with a class — every other class in the roster is referred to by role rather than by name in public sources. That is why veteran players treat the Mothership fight as a progression checkpoint rather than a side encounter: clearing it is the cleanest way to unlock the Alien class and the bus variant that scales with it.
Reward Tiers by Mode
The same boss drop table shifts hard between modes, and the tier jumps are large enough that farming bosses on a higher mode is the fastest way to gear up. The table below summarizes the public community data on drop quality by mode.
| Mode | Drop Quality Floor | Drop Quality Ceiling | Notes |
|---|---|---|---|
| Story | Common | Uncommon | Best for learning fights |
| Hard | Uncommon | Rare | Best balanced farm |
| Nightmare | Rare | Legendary / Unique | Only path to top-tier |
Players chasing last stop boss tips for farming should treat Hard Mode as the practical sweet spot, because the drop floor already sits at uncommon and the boss HP is still low enough to clear the gauntlet in a single bus tank. Nightmare is the right pick once your bus is fully upgraded, your squad comp is locked, and you specifically need the Alien Mothership drop or the secret ending flags.
Hidden Rewards and Ending Flags
Beyond the gear drops, several bosses feed into ending flags that you cannot unlock any other way. The cure Fred ending requires the finale token from Fred, the secret ending requires the Anubis and Vampire Lord setup, and Nightmare Mode gates the Alien class. Players who skip the boss fights entirely end up locked out of the true ending and the secret ending, so the boss gauntlet is not optional content even if your bus is strong enough to brute-force the zombie waves.
Last Stop Boss Tips: Loadout, Ammo, and Squad Comp
The five tips below are the ones that experienced players repeat the most in the September 2026 community data, and they are the foundation that every other last stop boss strategy builds on. None of them are class-locked, and none of them require the Alien bus — they are general principles that scale with whatever bus you have built.
-
Budget your ammo across the gauntlet. Meleeng roaming zombies saves bullets for bosses.
-
Sell corpses with the sack between fights to bank enough for the next bus upgrade.
-
Park the bus as cover rather than as a weapon platform for ranged bosses.
-
Split statue and add damage so no single player is the only target.
-
Bring at least one explosive for the Fred finale so the add waves stay manageable.
The bus loadout is the multiplier on every one of these tips, because the Snow Plough Grill, the Saw Grill, the roof storage box, and the tires and fuel upgrades are what let you reach the boss arenas with ammo, fuel, and spare parts still in the bank. Players who skip bus upgrades to rush the boss list almost always end up stranded at the military base with no bullets and no fuel, which is the single most common reason runs end before the first boss.
Ammo Budgeting Across the Gauntlet
The meta-strategy that the community has converged on is to treat ammo as a boss-only resource, because the zombie waves between bosses can be cleared with melee, and the sack sell loop covers your bus upgrade costs. A typical Nightmare run burns through two full magazines per boss if you kite properly, and the Alien Mothership fight can eat a third, so showing up to Fred with an empty inventory is the fastest way to lock yourself into the bad ending.
The practical budget is to bring a burst rifle, a shotgun, and a sidearm to every boss, and reserve the rocket launcher for the Fred finale. The shotgun is the most swap-heavy weapon in the run because it is the cleanest counter to adds, but it burns shells fast, so players who lean on the shotgun should also lean on the sack sell loop to keep their wallet topped up between fights. The full ammo loop is documented alongside the broader clear routes in the boss order walkthrough, which maps the gauntlet from the first encounter to the finale.
Squad Roles for Boss Fights
A 25-player server does not mean you should bring 25 damage dealers. The community-tested squad comp for a clean boss run splits into four roles: a kiter who pulls the boss, a burst damage who lands damage during recovery windows, a statue or add clearer who handles the mechanic, and a bus driver who repositions the bus between phases. The kiter and the bus driver often swap roles between fights, because the kiting terrain that works for the Military is useless against Anubis.
Players running solo or in a two-person squad should lean on the bus as a hard cover and treat every boss as a kite rather than a duel, because the boss HP scaling in Hard and Nightmare assumes a full squad. Solo runs are still possible, but the last stop boss strategies that work in a 25-player server need to be adjusted downward, with extra emphasis on the sack sell loop and a heavier ammo budget per fight.
Putting It All Together: A Full Boss Gauntlet Run
A clean full run in Last Stop is the product of route planning, bus upgrades, and boss execution in that order, and the table below is a community-tested gauntlet order that you can use as a starting point for your own run. The order is not fixed, but the fight order is what most public guides have settled on, and it lines up with the last stop cure Fred ending path that most players are chasing.
| Order | Boss | Key Item to Bring | Post-Fight Action |
|---|---|---|---|
| 1 | Military | Burst rifle, sidearm | Sell corpses, refuel |
| 2 | Anubis | Shotgun, statue ammo | Buy roof storage if not owned |
| 3 | Vampire Lord | Sniper / accurate sidearm | Unlock secret ending flag if applicable |
| 4 | Alien Mothership (Nightmare only) | Ranged burst, rockets | Unlock Alien class |
| 5 | Hollowjack (Nightmare secret) | Dodge timing, melee mod | Unlock Vault cosmetic |
| 6 | Fred | Rocket launcher, grenades | Choose cure vs. bad ending |
The gauntlet works because each step sets up the next: the military base gives you the rifle parts you need for Anubis, Anubis sets up the Vampire Lord encounter, and the Vampire Lord feeds the secret ending flags that you need to access the finale. Skipping a step usually means you show up to a later fight without the right ammo, which is the most common reason runs collapse halfway through the boss list.
Players who want a more granular view of where each boss sits on the difficulty curve can cross-reference the boss tier list, which ranks every confirmed encounter by clear rate, ammo cost, and reward value. The tier list is the right read if you are trying to decide which boss to skip on a partial run, and the gauntlet table above is the right read if you are committing to a full clear.
Frequently Asked Questions
What is the easiest boss for new players to learn first?
The Military at the military base is the easiest first clear because its kiting counter is forgiving and the arena is open. Bring a burst rifle, pull the boss into a field, drop the gunners, and burst the boss during reload windows. The clear feeds rifle parts into your next fight.
How do I unlock the cure Fred ending in Last Stop?
The cure path requires clearing the standard boss gauntlet, then reaching the finale with a stockpile of explosives to handle the add waves. Fred drops the cure vial that gates the cure Fred ending, and the true ending path requires that the escort NPC reaches the cure point alive, so prioritize the adds over the boss.
Why are the Anubis statues so important?
The four Anubis statues in the arena cast a damage-immunity shield on the boss, so direct damage is wasted until they are destroyed. Split the squad to clear statues first, then commit damage to the boss once the shield drops. Skipping the statues is the fastest way to wipe the run.
What is the best bus loadout for the full boss gauntlet?
A balanced bus with the Snow Plough Grill, roof storage, upgraded tires, and a full fuel tank handles every boss in the standard rotation. Add a Saw Grill if you want chip damage during kiting, and stack explosives in the roof box for the Fred finale.
Can I clear every boss solo in Nightmare Mode?
Yes, but the ammo budget and bus upgrades matter much more than in a squad run. Treat every boss as a kite, lean on the sack sell loop to bank between fights, and bring at least one explosive to the Fred finale. Solo Nightmare is the cleanest way to unlock the Alien Mothership drop and the Hollowjack secret encounter.