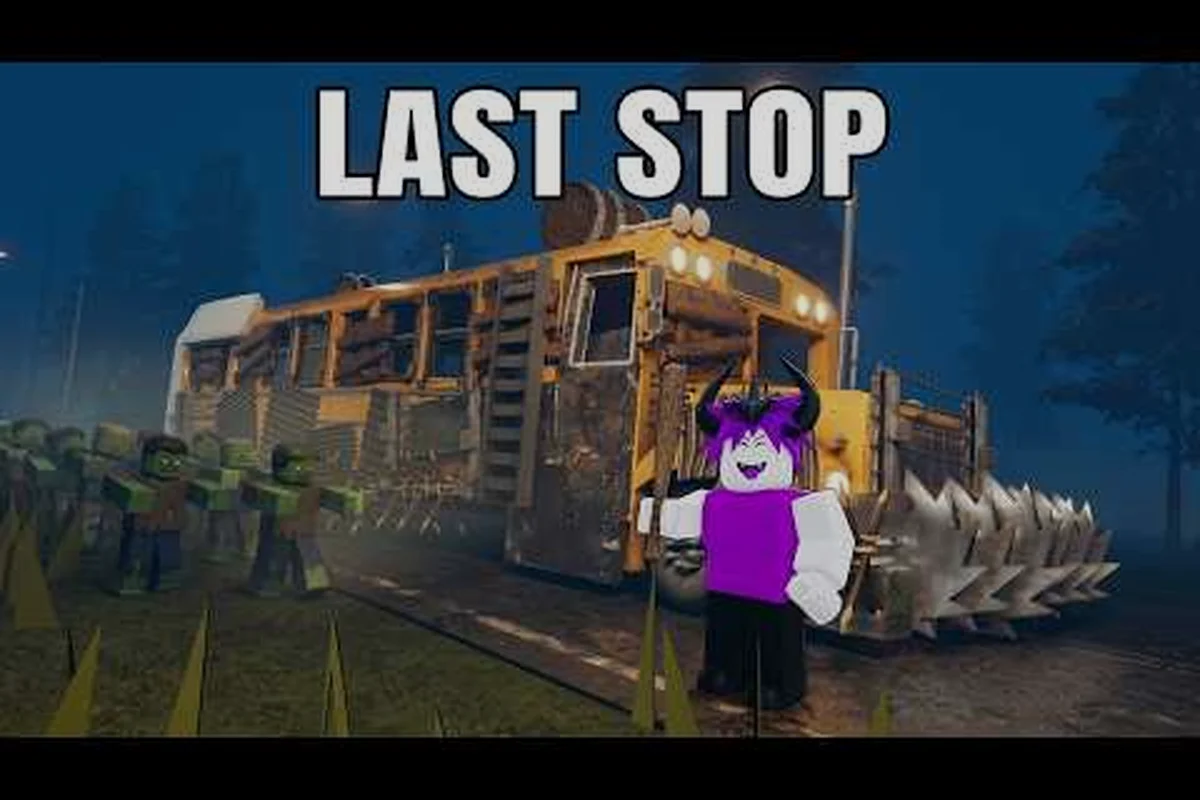
Armor decides whether a Last Stop run reaches the finale or detonates at the second checkpoint, and every wall upgrade is a permanent survival tax on a chassis already strapped for fuel, tires, and storage. The bus you walk out of the garage with is a fiberglass coffin; the bus you pull into the Last Stop is a mobile bunker held together by metal walls, a hardened grill, and a fuel chest you remembered to place at stop one. This guide walks through the full armor ladder in Last Stop, maps each wall tier to the road leg where it pays for itself, and breaks down the snow plough versus saw grill decision so your build stops dying to a single Brute charge.
The data points below come from the live 2026 patch (Ocean Biome + Nightmare Mode era), community testing reported by content creators like Atlantic Blox's bus-survival breakdown and DustPlays' alien class and bus overview, and the in-game build menus verified during the September 2026 patch cycle. Numbers and unlock costs reflect community-reported averages and may shift by ±very low with the next hotfix.
The Last Stop Bus Armor Ladder: Wall Tiers From Fiberglass to Metal
Every bus rolls out of the starting town with basic walls — thin, cheap, and essentially decorative. They will stop a single Roamer, maybe two, before buckling against a Brute zombie or a rocket burst from bandits. The Last Stop armor system stacks four broad wall tiers onto the chassis, each tier multiplying the damage your bus absorbs before a panel breaks and exposes the interior to melee swarmers. Understanding the entire ladder — not just the top — is what separates a crew that limps to stop four from one that rolls into the finale.
The four tiers in the current 2026 build are Basic, Reinforced, Heavy, and Metal. They unlock through crafting recipes at the workbench inside your bus and through blueprint drops scavenged from cabins, dumpsters, and roadside shacks. A fifth cosmetic-only skin (painted variants) has no defensive value, so it does not enter the tier math.
| Wall Tier | Approx. HP per Panel | Cost Tier (Common Scrap) | Best Use Window | Weakness |
|---|---|---|---|---|
| Basic Walls | Minimal | Free (default) | Tutorial leg, stop 1 only | Collapses in 1 Brute slam |
| Reinforced Walls | Low | Cheap scrap and bolts | Stops 1–2, mid-run bridge | Cracks under sustained ranged fire |
| Heavy Walls | Moderate | A mid-tier scrap investment | Stops 3–4, prep for checkpoint boss | Heavy weight slows top speed noticeably |
| Metal Walls | High | A heavy scrap and alloy investment | Final leg, finale, Nightmare Mode | Highest scrap grind; alloy sheets are rare |
Three rules govern this ladder. First, HP does not scale linearly with cost — jumping from Heavy to Metal costs roughly double the scrap but triples the durability, which is why veteran crews treat the Metal tier as a finale-only commitment. Second, weight is the hidden tax: each tier above Reinforced adds chassis weight that costs you top speed, which in turn forces you to budget more fuel and run more frequent pit stops. Third, patched-in materials (alloy sheets, plating) only drop at the harder stops, so the wall you can afford is dictated by where on the roadmap you happen to be.
Why Basic Walls Are a Death Sentence Past Stop 1
The starter walls are designed to teach you that the bus is destructible. They die in a single Brute zombie charge, shatter under a single rocket from bandit gunners, and offer zero protection during an acid rain shower when melee swarmers pound the panels. By the time the second checkpoint road sign appears, every wall on the bus should already be Reinforced. According to community testing summarized in Cocajola's full Last Stop guide, crews that delay the first wall upgrade past stop two lose the bus an average of substantially more often during the third-leg boss rush.
Reinforced Walls: The Real Mid-Game Floor
Reinforced walls are the first tier that meaningfully changes your survival math. They survive two Brute charges, deflect a single rocket burst without losing a panel, and let you drive through a small acid-rain swarm without an interior breach. The scrap cost is low enough that you can finish the upgrade in a single scavenge loop at stop two, and the added weight is negligible — your top speed stays barely different from the basic-bus baseline. For solo runners, this is the tier where the run starts to feel stable rather than lucky.
Heavy Walls: The Checkpoint Boss Wall
Heavy walls exist for one reason: surviving the burst windows of the mid-run bosses. The Military boss's rocket salvo, the Vampire Lord's lunge combo, and the Anubis statues' charge pattern all deal damage in a tight window that Reinforced walls can weather but not always survive. Heavy walls absorb a full burst from any of them with panels to spare, giving your crew the recovery time to kite and reload. The cost is real — you will spend a full stop scrapping for plating and bolts to finish the upgrade — but the trade is clean: more weight, more durability, fewer restart-from-zero nights.
Metal Walls: The Finale Commitment
Metal walls are the apex of the Last Stop bus armor system in the current patch. They eat a full Brute enrage combo, shrug off the finale's burst phases, and turn the Nightmare Mode boss rush from a coin flip into a winnable fight. The cost is brutal: alloy sheets drop only from high-tier roadside shacks and military checkpoints, the scrap grind eats your entire stop-three scavenge window, and the added weight forces you to make a real decision about tires and fuel. The pay-off is total — once a bus is running on Metal walls plus bulletproof windows plus a hardened grill, the only thing left that can kill it is a tactical mistake, not raw damage intake.
Last Stop Bus Grills: Snow Plough vs Saw Grill
The grill sits at the front of the chassis and does double duty: it shapes the bus's collision profile on the road, and it determines what happens to zombies, bandits, and rogues that walk into your lane. Two grills dominate the meta — the Snow Plough and the Saw Grill — and the choice between them is the most consequential single decision you make before the wheels start turning.
The Snow Plough grill is the durability play. It adds a wedge plate to the front of the bus that deflects melee swarmers off to the side rather than absorbing the hit, which means your front panels take almost no direct damage during a road charge. It also pushes debris, dumpsters, and small obstacles out of the way without losing speed, which saves fuel and tire wear on long legs. The trade is offense: the plough does zero damage to anything that hits it. Zombies bounce sideways, regroup, and chase from a new angle.
The Saw Grill is the offense play. It replaces the front wedge with a spinning blade rack that shreds anything it touches — Roamers die on contact, Runners lose half their health in a single brush, and Brute zombies take meaningful chip damage as you ram through a swarm. The trade is durability: the spinning blades take continuous damage themselves, they slow the bus slightly because of the drag, and they degrade faster than the Snow Plough's plate under acid rain.
| Attribute | Snow Plough Grill | Saw Grill |
|---|---|---|
| Primary Role | Deflection + durability | Damage + lane clearing |
| Damage to Zombies on Contact | None | High (Roamers one-shot, Brutes chip) |
| Self-Damage / Degradation | Low | Moderate (notable under acid rain) |
| Speed Penalty | Negligible | A slight top-speed penalty |
| Fuel Cost per Mile | Baseline | A modest drag penalty |
| Best Paired With | Heavy or Metal walls + bulletproof windows | Reinforced walls + ranged damage crew |
| Weakness | Zombies bounce into flanks | Blade degradation in long fights |
The community zombie-bus runs show top-tier crews pairing the Snow Plough with Metal walls for the final push because the deflection profile keeps the front panels pristine through boss rushes, while Saw Grill builds shine in mid-run scavenge windows where clearing a swarm in two seconds matters more than peak durability. A common mistake is mounting the Saw Grill on a Heavy-or-better chassis — the drag and the weight stack into a fuel nightmare that turns a late route run into a 60,000-mile resource crisis.
Bulletproof Windows, Wall Traps, and the Rest of the Defensive Stack
Bus armor in Last Stop is more than just walls. The chassis has a fixed number of attachment slots — typically one grill, four window slots, two side-armor panels, and a roof rack — and every slot you fill is a slot you cannot spend on a storage chest, a sleeping bag, or a fuel can. The defensive stack has four meaningful pieces beyond walls, and each one earns its slot on a different leg of the run.
Bulletproof Windows are the most underrated slot in the early game. They cost a small amount of scrap and a handful of bolts, they have no weight penalty, and they convert ranged bandit fire from a panel-shredding threat into a survivable nuisance. By the third stop, every window slot on the bus should be bulletproof. Crews that skip this upgrade lose the bus an average of once per run to a single bandit gunner salvo that punches through the side glass and spawns a melee cascade inside the cabin.
Wall Traps are the second line of defense and the best answer to the Alien UFO boss waves. Wall traps are placed on the outside of the bus, trigger on contact, and deal heavy damage to anything that touches the panel. They are consumable — each trap lasts for one engagement — but they single-handedly win UFO waves when paired with a Metal-wall bus. For more on how wall traps interact with the UFO encounter specifically, the wider Last Stop boss strategy guide ranks them in the top three defensive consumables.
Spikes are the cheap cousin of wall traps. They deal less damage, last longer, and have a critical downside: they damage your own bus if you drive over them after a swing, and they shred your tires if you back over them at a stop. The general rule is to mount spikes only on the rear of the bus, never on the sides, and never on the front where a missed swing will chew your own grill. The deeper spike-versus-trap math is covered in the spare-tire and slot-efficiency guide, but the short version is: traps win boss waves, spikes win mid-run swarm clears.
Side Armor Panels are the late-game tier above Reinforced walls. They cost plating rather than scrap, they add visible bulk to the bus's silhouette, and they exist almost exclusively to keep the bus alive through the Anubis statue charge and the finale's burst phase. For most crews, side armor is a stop-four purchase, not a stop-two priority. The cost-benefit math only flips if your crew composition is heavy on melee classes that draw aggro away from the bus — under those conditions, side armor becomes the first wall upgrade you finish, not the last.
| Defensive Slot | Cost Tier | Best Leg to Install | Pairs With |
|---|---|---|---|
| Bulletproof Windows | Low | Stop 2 | Any wall tier |
| Wall Traps (consumable) | Medium per stack | Stop 3, restock at 4 | Metal walls + Snow Plough |
| Spikes (rear only) | Low | Stop 2 | Saw Grill + Reinforced walls |
| Side Armor Panels | High | Stop 4 | Heavy or Metal walls |
Last Stop How to Get a New Bus and the Bus Roster
The bus you spawn with is not the only bus in the game. The full Last Stop bus list as of the September 2026 patch includes the Starter Bus, the Gold Bus, the Pirate Bus, the Alien Bus, and the limited-event Haunted Bus (Update 2 anniversary drop). Every bus has a different base chassis — different starting wall HP, different attachment slot count, different cosmetic — and the right bus for your run depends on the class composition and the wall tier you intend to chase.
The Starter Bus is what every crew rolls out with. It has four wall slots, one grill slot, and the standard window-and-side-armor layout. Its base wall HP is the lowest of any bus in the roster, which means your first scrap grind goes directly into walls rather than into storage or fuel upgrades.
The Gold Bus is the mid-game upgrade, and it is the bus most veteran crews run for the final push. It has the same four wall slots as the Starter but with higher base HP on every panel, a built-in bulletproof window on the driver's side, and a small fuel-tank bonus that saves one pit stop across a full run. The Gold Bus is unlocked by completing the second checkpoint's side objective and purchasing it from the town vendor for a 4,500-cash fee.
The Alien Bus is the Update 2 drop and the current best bus for the Ocean Biome. It comes with a built-in wall-trap slot on each side, a higher chassis weight that actually helps stability in the ocean swell, and a unique cosmetic that signals to other crews you are running a serious build. The alien bus unlock walkthrough covers the ticket-and-blueprint grind, but the short version is that it is a class-coupled unlock: you cannot buy the bus without first unlocking the Alien class.
The Pirate Bus is a sidegrade rather than an upgrade. It has higher base speed than the Gold Bus, lower base HP, and a built-in spike rack on the rear bumper. It is the bus for crews that want to outrun encounters rather than tank them, and it pairs naturally with a Saw Grill + ranged-damage build. The Haunted Bus is a cosmetic-and-stat hybrid from the limited Update 2 event; it may or may not return in future cycles.
| Bus | Base Wall HP | Slots | Speed | Best Wall Tier | Best Paired Class |
|---|---|---|---|---|---|
| Starter Bus | Lowest | 4 walls, 1 grill | Baseline | Heavy | Support / melee build |
| Gold Bus | High | 4 walls, 1 grill, 1 built-in window | Baseline + small fuel bonus | Metal | Ranged / builder |
| Alien Bus | High | 4 walls, 1 grill, 2 built-in trap slots | Slower (ocean stable) | Metal | Alien / Electrocute |
| Pirate Bus | Medium | 4 walls, 1 grill, rear spike rack | Fastest | Reinforced + Heavy | Ranged / loot runner |
Learning how to get a new bus is a progression gate as much as a spending decision. The Gold Bus is a cash purchase, so it is the first upgrade most crews finish. The Alien Bus is class-gated and event-tied, so it is the bus you finish on your second or third run rather than your first. The Pirate Bus drops from a specific scavenge node, so it is a luck-based pickup that some crews never see.
Pairing Bus Armor With Class Choice, Weapons, and Fuel
Armor does not win runs in isolation. The wall tier you chase has to match the class your crew is running, the weapons you can actually afford, and the fuel budget you can sustain across 100,000 miles. A Metal-wall build with a Saw Grill and no fuel chest is a 40,000-mile bus, not a 100,000-mile bus. A Heavy-wall build with bulletproof windows and a Snow Plough but a melee starter crew that cannot kite is a bus that lives forever but a run that never reaches the finale. The full system is interconnected, and the armor ladder only works when the rest of the build agrees with it.
The simplest pairing rule is defense role → high wall tier, offense role → mid wall tier + high offense slot. A melee or support crew draws aggro and soaks hits, which means the bus has to survive what the crew cannot, which means chasing Metal walls and bulletproof windows is mandatory. A ranged or loot-runner crew avoids aggro and wins through positioning, which means the bus can run Heavy walls and spend the saved scrap on ammo and fuel instead. The full class system breakdown covers how each class shifts the armor math, but the heuristic above is the one most veteran crews use to plan their stop-by-stop upgrade path.
The second pairing rule is ranged damage → Saw Grill + traps, melee damage → Snow Plough + side armor. Ranged classes can clear a swarm from inside the bus, which means the bus only needs to survive the few seconds it takes them to reload, and a Saw Grill plus wall traps covers that window. Melee classes have to step outside the bus to deal damage, which means the bus has to survive a longer engagement window without them, and a Snow Plough plus side armor covers that window without burning scrap on consumables.
The third pairing rule is wall tier → fuel chest size → sleeping bag timing. A Heavy-wall build adds enough chassis weight to cost you a tiny share of your top speed, which costs you a tiny share of your fuel efficiency, which means you need an extra fuel chest slot to compensate. A Metal-wall build costs you a small share of your top speed, which costs you a small share of your fuel efficiency, which means the fuel chest has to be a priority upgrade, not an afterthought. Sleeping bag timing is the final piece: the heavier the bus, the harder it is to outrun a night ambush, which means crafting the sleeping bag earlier in the run and using it as a defensive tool rather than a last-resort panic button. For the deeper fuel-and-resource math, the Last Stop fuel guide breaks down the chest placement, the gas-tank timing, and the spare-tire economy that keeps a heavy bus on the road.
| Crew Composition | Recommended Wall Tier | Recommended Grill | Recommended Defensive Slot |
|---|---|---|---|
| melee starter + support role (tank) | Metal | Snow Plough | Side armor + bulletproof windows |
| ranged starter + looter role (kite) | Heavy | Saw Grill | Wall traps + bulletproof windows |
| builder role + ranged starter (hybrid) | Metal | Snow Plough | Bulletproof windows + 1 wall trap stack |
| Alien + Electrocute (boss rush) | Metal | Snow Plough | Wall traps + side armor |
| Solo melee starter | Heavy | Snow Plough | Bulletproof windows + sleeping bag priority |
Frequently Asked Questions
Which Last Stop bus armor tier should I aim for on a first run?
A first run should target Reinforced walls by stop two and Heavy walls by stop four. Metal walls are too expensive for a first-run scrap budget and they punish new players with the added weight tax. Once you have a successful run under your belt, the second run is when the Metal-tier grind becomes realistic.
Is the Snow Plough grill or the Saw Grill better for a solo player?
For solo runs, the Snow Plough is the safer pick. It deflects melee swarmers without requiring you to babysit the blade degradation, it costs no fuel overhead, and it pairs cleanly with a Heavy-wall build that a solo player can actually afford. The Saw Grill is a higher-skill option that wins time on swarm clears but loses time on blade repairs and fuel runs.
What is the difference between the Gold Bus and the Alien Bus in terms of armor?
The Gold Bus has higher base wall HP and a built-in bulletproof window, which makes it the better pure-armor chassis for a crew that plans to chase Metal walls and tank burst phases. The Alien Bus has lower base wall HP but two built-in wall-trap slots, which makes it the better chassis for a crew that plans to lean on consumable defense and boss-wave damage. Both are valid; the choice is between permanent durability and consumable offense.
Do I need Metal walls to beat the final boss in Last Stop?
No, but the margin is thin. A Heavy-wall bus with bulletproof windows, a Snow Plough, and a fuel chest can beat the finale, but it requires clean execution on every burst phase. A Metal-wall bus gives you a full recovery window on every burst, which is what makes the run feel consistent rather than heroic. For Nightmare Mode, Metal walls are mandatory rather than recommended.
How do wall traps compare to spikes for bus defense?
Wall traps deal more damage and win boss waves, but they are consumable and they cost more per engagement. Spikes deal less damage but last longer and cost less, and they are best mounted on the rear of the bus for mid-run swarm clears. The two are not interchangeable: traps win UFO waves, spikes win routine scavenge encounters, and a serious build runs both.