Your bus in Last Stop is the difference between crawling the early route and surviving the full 100,000-mile road to the Last Stop itself, which is why understanding the build system early matters more than any weapon or class choice you make in the first hour. The Z build action is the single most-used key in the entire game, and the bus parts you place with it determine whether a wave of zombies crumbles against your chassis or boards your cabin. Walls, windows, grills, storage chests, traps, and roof racks all attach through the same tap-to-confirm flow, and the order you place them defines how the late game actually feels.
This Last Stop bus building guide walks through the parts worth buying, the loadout math behind last stop metal walls versus wood, the snow plough versus saw grill trade-off, and a practical upgrade order so you stop wasting cash on dead slots. Every section is written for solo and small-coop crews running the standard difficulty curve, with notes on where Nightmare Mode shifts the priorities.
The Z Build Action and How Last Stop Bus Parts Slot In
The Z build action is Last Stop's universal placement key. With a part selected in your hotbar, Z opens a translucent ghost preview that snaps to legal grid positions on the bus chassis. Click to confirm, and the part materializes instantly with no build-time bar or resource cost beyond the cash you already paid at the vendor. Every removable item in the game — walls, windows, grills, traps, chests, spikes, roof racks, the fuel chest, and even the spare tire — is placed through this same flow.
Legal Placement Zones on the Chassis
Not every grid cell accepts every part. The chassis is divided into named regions, and the part you are holding filters out invalid zones automatically. Walls can only attach to the side rails; grills clip only onto the front nose; the spare tire and fuel chest lock to underbody mounts. Trying to place a saw grill on the side of the bus will simply show a red ghost and refuse to confirm.
| Zone | Accepted Parts | Notes |
|---|---|---|
| Front nose | Snow plough, Saw grill, Bull bar | Single slot, one grill only |
| Side rails (left/right) | Wood wall, Metal wall, Bulletproof window, Spike, Wall trap | Two rows tall, four bays long |
| Roof | Roof rack, Sleeping bag, Turret mount | Single row along the centerline |
| Underbody | Spare tire, Fuel chest | Hardpoints on both sides |
| Rear bumper | Spare tire (alt mount), Tow hook | Limited to utility parts |
The grid system is generous compared to most Roblox survival games, but spacing still matters. Place walls flush against each other to seal a side, or leave a one-tile gap to drop a window for line-of-sight firing. Mixing materials in the same wall is allowed but visually messy and offers no real benefit over a uniform row.
Inventory vs. Hotbar Limits
You can own dozens of each part type in the deep inventory, but only the hotbar slots drive placement. The default hotbar holds 8 parts, and pressing Tab opens the deep inventory to drag extras in. For a typical mid-run build you want the hotbar stocked with: 2× metal wall, 1× bulletproof window, 1× saw grill or snow plough, 1× wall trap, 1× spike, 1× roof rack, and 1× spare tire. The last slot rotates based on what you are about to place.
If you are still learning the grid, the Last Stop beginner guide covers the broader onboarding flow including controls and the loot-to-vendor economy that funds all of this in the first place. The Z build action is the one that actually places parts, which is why the grid starts making sense once you watch a placement once or twice.
Last Stop Bus Walls: Wood vs Metal vs Bulletproof
The last stop bus walls system has three tiers, and the upgrade curve from wood to metal to bulletproof is the single biggest survival jump in the entire bus building guide. Each tier adds hit points, changes the sound when zombies bang on the chassis, and shifts the break threshold at which a part shatters into scrap.
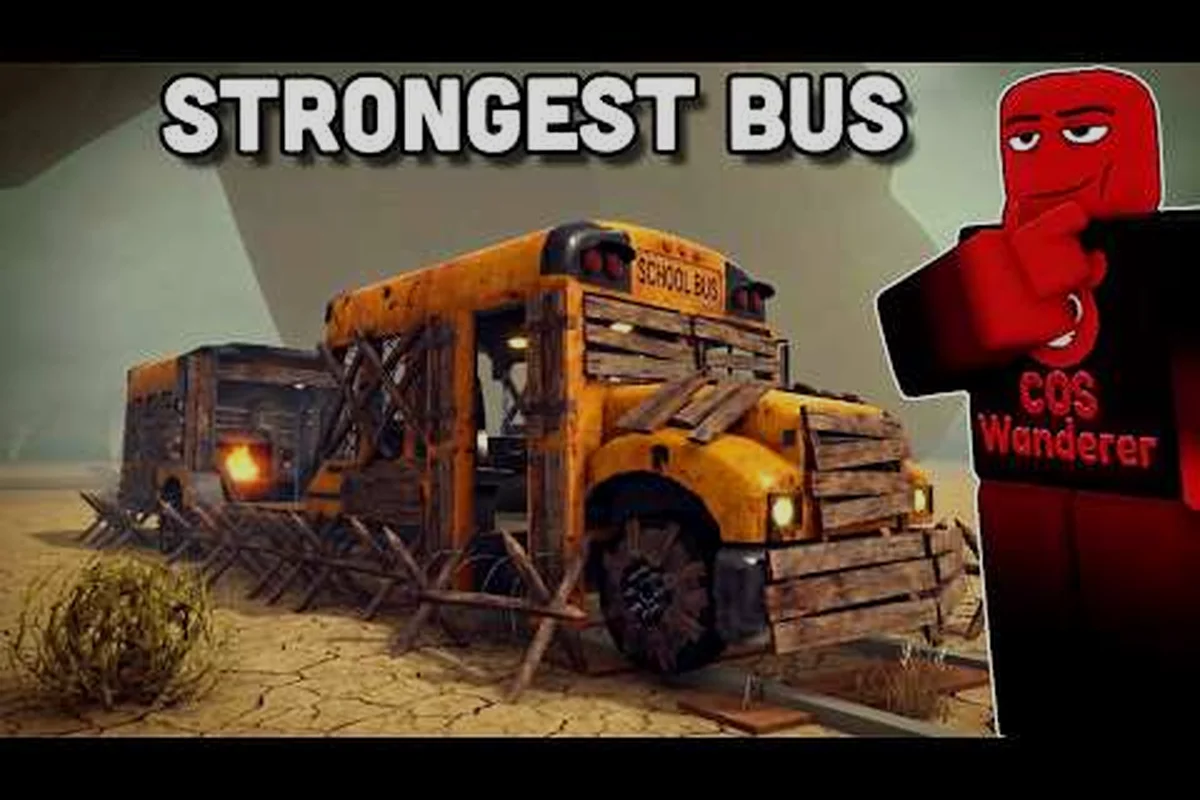
The bus is not assembled from a recipe. You start with a chassis and then bolt upgrades onto it at each bus stop, buying walls, grill options, bulletproof windows, roof storage, fuel and spare tires with the cash your loot brings in, as demonstrated in Atlantic Blox's zombie-bus build run. Those numbers vary between runs because the workbench cost scales with the build tier, but the planks-ingots-wheels foundation stays constant.
Wood Walls: Cheap, Disposable, Fine for the Early Route
Wood walls cost almost nothing at the vendor and are sold at every bus stop, which makes them the default first wall. They stop one or two zombie hits before breaking, and a single Brute slam will pop them instantly. Their real value is the speed of placement during the first cabin rush — you can throw up a row of four in a brief window and seal the bus before the first wave closes in.
Metal Walls: The Mid-Game Standard
Last stop metal walls are the workhorse of any serious run. They cost roughly 8–10× a wood wall at the vendor, but they absorb a full Brute charge, shrug off most ranged bandit fire, and only crack under sustained acid rain or boss focus fire. Once you unlock the second bus stop and start selling corpse loot in bulk, replacing every wood wall with metal is the highest-value purchase you can make.
The community-tested HP numbers below come from player reports on Nightmare Mode beta builds; standard mode runs noticeably higher on every row, but the relative ranking is identical. In practice that means metal walls still outclass every earlier tier in both modes, so you can read the HP table as the same priority order either way.
| Wall Type | Cost Band (vendor) | HP Band (Standard) | HP Band (Nightmare) | Brute Slam | Acid Rain Tick Band |
|---|---|---|---|---|---|
| Wood | Low | Very low | Very low | 1-hit break | Very low |
| Metal | Moderate | Moderate | Moderate | Survives 1 | Very low |
| Bulletproof | High | High | High | Survives 2 | Low |
Bulletproof Walls and Windows: Late-Game Armor
Bulletproof windows are the second tier of ranged defense and slot into the same grid positions as walls. They block all bandit gunfire and most military-soldier rifle rounds while still letting you see out and click to shoot through them, which is critical for the late-game Oil Rig approach and any leg where the bus parks in a bandit camp perimeter. Pairing metal walls on the row below with bulletproof windows on the row above gives the side armor layered coverage and keeps the cabin fully sealed.
For a deeper dive on layered defense setups, the bulletproof windows and bus traps guide covers wall trap placement math, spike damage ticks, and the duo-versus-solo patterns that decide which defense layout wins on the final push. Layering traps behind walls is where the build guide and the defense guide overlap.
Grill Slot Choice: Snow Plough or Saw
The front of the bus takes a single grill slot, and the choice between the snow plough and the saw grill is one of the most-debated build decisions in the Last Stop community. Both are sold at vendors from the second stop onward, both attach with the same Z action, and both visually transform the front nose of the bus, but they fill completely different combat roles.
Snow Plough Grill: The Defensive Pick
The snow plough grill is a blunt ram plate that adds a full HP to the front of the bus and pushes zombies aside instead of letting them latch on. It does no damage, but it converts the bus into a mobile battering ram that clears roadblock debris, knocks runners out of the lane, and prevents Brutes from getting a clean charge angle. Solo players who struggle with the doorway-cheese loop lean heavily on the plough because it lets them keep driving instead of stopping to clear the cabin.
Saw Grill: The Offensive Pick
The saw grill swaps the blunt ram for a spinning blade array that deals good damage per tick (about 4 ticks per second) to anything directly in front of the bus. It does not push zombies aside — they hold position and take the damage — which makes it weaker against Brutes but devastating against the dense runner swarms that close the gap on the highway at night. The saw also chews through roadblock barricades in a short window, which is the fastest clearing speed in the game.
| Grill | HP Bonus Band | Damage Band | Pushback | Best Against | Weakness |
|---|---|---|---|---|---|
| Snow plough | Moderate | Very low | Strong (knockback) | Brutes, roadblock debris | Slows on dense swarms |
| Saw grill | Very low | Low | None | Runners, barricades | Brutes hold and chip you |
| Bull bar (rare) | Moderate | Very low | Medium | Mixed waves | High cost, late unlock |
The Hybrid Answer Most Veteran Runs Use
Players who reach the third bus stop with cash to spare often swap between grills at the depot depending on the next leg. A standard Nightmare run template is: saw grill for Stop 1 → Stop 2, then snow plough for Stop 2 → Stop 3 (the Brute-heavy forest stretch), then saw grill again for the highway loop where runner density peaks. Swapping costs nothing beyond a few seconds at the vendor and lets one grill cover its best case while the other covers the gaps.
Last Stop Bus Upgrades: Storage, Fuel, Tires, and the Spare Tire Slot
The walls and grill are the visible bus upgrades, but the real reason most runs fall apart before the Last Stop is missing the invisible inventory math that storage, fuel, and tires drive. Last stop bus upgrades include the fuel chest, the spare tire, the roof rack, double chests, and the sleeping bag — none of which sit on the side rails but all of which decide whether you reach the next stop or strand in the dark.
Spare Tire: The Most Underrated Slot
The spare tire is a single hardpoint under the bus that revives a destroyed wheel after it blows out. Wheel blowouts are the most common run-ender in the opening stretch, because a single bandit roadblock or a sharp zombie contact can pop a tire, and a bus with three wheels cannot outrun the night swarm. The spare tire costs roughly 1,500 at the vendor — about three metal walls — and it pays for itself the first time it saves a run. Solo players in particular should treat the spare tire as a non-negotiable first-week purchase.
Fuel Chest and the Gas Tank Trade-Off
The fuel chest mounts under the bus next to the gas tank and extends your driving range noticeably on a full tank. It is the single best long-run investment once you start hitting the mid-route legs, because most stranded runs come from running dry in a no-stretch zone rather than from combat. A detailed fuel chest and gas tank guide covers the chest's stacking behavior, the fuel-to-distance math, and the stop-to-stop trade routes that keep the tank topped off without burning corpse-loot cash.
Roof Rack, Double Chests, and the Sleeping Bag
The roof rack adds a single row of storage on top of the bus and is the only legal placement for bulky items like fuel cans and ammo crates. Double chests snap onto underbody hardpoints and roughly double the deep inventory size, which is what lets you carry enough metal walls and saw grill spares to survive a full Nightmare run without returning to a vendor. The sleeping bag skips the night-cycle entirely when used from the roof, which is the safest way to convert dangerous dark hours into free scrap and class XP.
| Upgrade | Cost Band (vendor) | Effect | Priority |
|---|---|---|---|
| Spare tire | High | Revives blown wheel | 1st purchase |
| Fuel chest | Very high | A large range boost | 2nd purchase |
| Double chest | High | A second deep inventory row | 3rd purchase |
| Roof rack | High | Roof storage row | 4th purchase |
| Sleeping bag | High | Skip night cycle | 5th purchase |
Last Stop Bus Building Guide: Recommended Upgrade Order and Loadout
A practical last stop bus building guide needs more than a parts list — it needs a loadout that fits the four legs of the standard run. The build order below assumes a solo player on Standard difficulty, with checkpoints at each bus stop and roughly 8,000–12,000 cash in hand at each depot.
Leg 1: The Opening Stretch
At the start of the run you spawn with a bare chassis and 500 starting cash. The first vendor at Stop 1 sells wood walls, the saw grill, and the spare tire. Buy the spare tire immediately (it is the only part that prevents an instant run-ender from a single bandit encounter), then spend the rest on 4× wood walls to seal both sides of the cabin. Skip the saw grill for now; with no walls the bus is too fragile to take advantage of the damage.
Leg 2: Stop 1 to Stop 2 (The Forest Stretch)
After clearing the first cabin and selling the corpse loot, you should have roughly 3,000–4,000 cash. Replace the wood walls with 4× metal walls on the side rails, add 2× bulletproof windows above them, and slot the saw grill onto the front. This is the moment when the bus stops feeling like a fragile deathtrap and starts feeling like a mobile fortress.
| Leg | Cash Band in Hand | Required Buys | Optional Buys |
|---|---|---|---|
| Leg 1 (start) | Moderate | Spare tire (1,500) — save first | 4× wood walls (200) |
| Leg 2 (Stop 1) | Very high | 4× metal walls (1,800) | Saw grill (900) |
| Leg 3 (Stop 2) | Very high | Fuel chest (2,200), double chest (900) | 2× bulletproof windows (1,400) |
| Leg 4 (Stop 3) | Very high | Wall trap (1,800), spike (1,100) | Sleeping bag (1,100) |
Leg 3 and Leg 4: The Highway Loop and the Final Push
By Stop 2, switch the saw grill for the snow plough to handle the Brute-heavy forest stretch, then re-equip the saw at Stop 3 for the highway loop. Drop a wall trap on the side of the cabin to thin runners as they board, and slot spikes along the bottom edge of the side rails to punish anything that gets under the bus. Save the sleeping bag for the final leg when night cycles become unavoidable, and use it from the roof to skip the worst of the dark hours.
If you find yourself running low on rockets or bullets in the late game, the save ammo and weapon upgrade guide covers the ranged loadout math that pairs with a heavy bus build, including when to swap guns and how to budget rockets for boss fights.
Last Stop Bus Parts: Advanced Tactics and Common Mistakes
Once the chassis is fully loaded with metal walls, bulletproof windows, the saw grill, and a fuel chest, the build is "complete" in the sense that you can clear any standard leg. But two advanced tactics separate Nightmare Mode clears from mid-run wipes, and both come from how you place the parts rather than which parts you choose.
The Two-Row Wall Trick
Instead of a single row of metal walls on the lower side rails, place a second row of metal walls on the upper side rails with bulletproof windows in between. This stacked armor setup doubles the HP on each side bay, lets one row break while the second holds, and gives you a clear line of fire through the windows. The cost is roughly double the wall spend, but it is the only build that reliably survives a Nightmare Brute charge into the side of the bus.
Why the Fuel Chest Placement Matters
The fuel chest has to be placed on the underbody hardpoint closest to the gas tank, otherwise the bonus range is reduced substantially. Most new players place it on the wrong side, notice the range drop, and assume the part is bugged. The visual preview ghost highlights the correct hardpoint with a green tint, while the wrong slot shows yellow. Always confirm green before clicking to confirm placement.
Common Mistakes That Burn Cash Fast
The single most expensive beginner mistake is buying two snow ploughs because the vendor restocks and the old one is still attached — the game does not refund the second one. Use the Q drop key to remove the old grill first, then buy the new one. The second most common mistake is placing wall traps on the inside of the cabin instead of the outside, which means the trap triggers on your own squad during a wave. Always preview-trap from the outside-facing edge of the side rail.
| Mistake | Cash Loss Band | Fix |
|---|---|---|
| Buying duplicate grills | High | Q-drop old, then buy new |
| Wall trap inside cabin | Very high | Always preview outside edge |
| Skipping spare tire | 1,500 later | Buy at Stop 1, no exceptions |
| Wrong fuel chest hardpoint | A large range loss | Confirm green ghost before click |
| Wood walls on Stop 3 legs | Full bus wipe | Replace with metal by Stop 2 |
Frequently Asked Questions
What is the most important bus part to buy first in Last Stop?
The spare tire is the highest-priority first purchase because a single blown wheel strands the bus in the opening stretch, and the only way to recover without losing the run is to have the spare tire already mounted. Walls, grills, and storage can all be added later at the next vendor, but a wheel blowout is an instant run-ender if the spare is not under the chassis.
Are metal walls worth the cost over wood walls in Last Stop?
Yes, metal walls are worth the upgrade as soon as you hit Stop 1 with 3,000+ cash in hand. The HP jump from 35 to 220 on Standard mode, or 28 to 175 on Nightmare Mode, is the single largest survival increase any upgrade offers, and metal walls are the only tier that survives a Brute slam. Wood walls function as a temporary seal during the first cabin rush but should be replaced before the second leg.
Snow plough or saw grill — which is better for solo players?
The saw grill is better for solo players in the first half of the run because the runner density on the early legs makes the per-tick damage the highest-value stat. Swap to the snow plough once you hit the Brute-heavy forest stretch between Stop 2 and Stop 3, then re-equip the saw for the final highway loop. Veteran solo runs rotate between the two grills at every depot based on the next leg's enemy mix.
Can I place bulletproof windows on every side of the bus?
No, bulletproof windows only fit on the upper side rail row, and you are limited to four windows per side. The lower row is reserved for metal walls, the front nose is reserved for grills, and the rear bumper is reserved for utility parts like the spare tire. Mixing the layout with windows on the lower row will cause the placement ghost to show red and refuse to confirm.
Do bus upgrades carry over between runs in Last Stop?
No, every part you buy and place is lost when the run ends, and the next run starts with a bare chassis and 500 starting cash. The only persistent progression is the class unlock system, blueprint milestones, and any active codes you redeem. Treat every run as a fresh bus build and focus the budget on the spare tire, metal walls, and a single grill for the first two legs.